The Complete Rucking Progression Guide for Your First Six Months
Quick Answer: Start at roughly 10 percent of body weight for 20 to 30 minutes, twice a week, and progress one variable at a time in small increments. Distance first, then weight, then terrain, then pace. Most rucking injuries come from adding weight and distance in the same week, and from a pack that carries the load too low. Six months of patient progression comfortably reaches a 20 to 25 percent load over an hour of hilly ground.
Rucking looks like walking with a bag, which is why people underestimate the loading and get shin, knee, or shoulder problems in week three. It is walking with a substantial and continuous increase in ground reaction force.

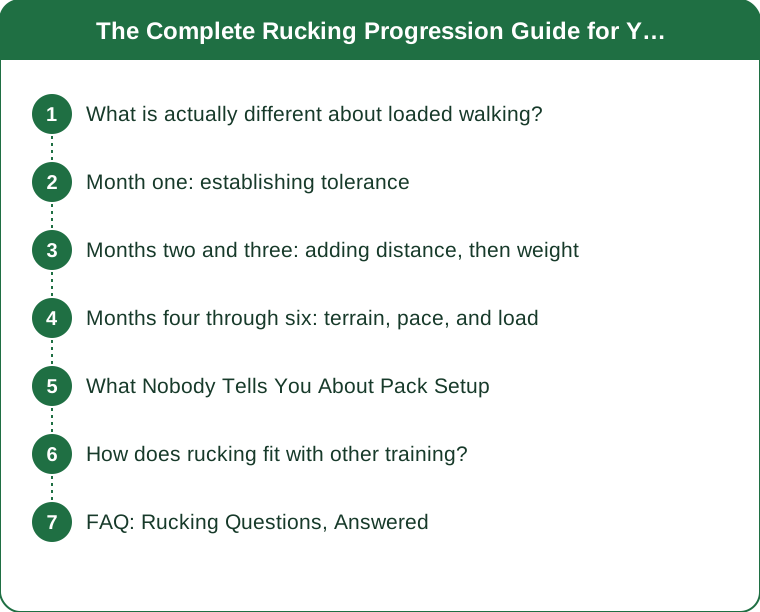
What is actually different about loaded walking?
The load changes the mechanics more than the effort, and that distinction matters for how you progress.
Carrying additional weight increases ground reaction force at every step. That force goes through the same structures as unloaded walking, but at a higher magnitude, sustained for the whole session, and repeated across thousands of steps.
The metabolic cost rises substantially, and it rises non-linearly with load. Adding weight increases energy expenditure more than the same weight added to your body would, partly because the pack does not move with the natural body mechanics as well as body mass does.
Posture changes. A loaded pack shifts the center of mass backward, and the body compensates by leaning forward at the trunk. That forward lean loads the lower back, the hip extensors, and the calves differently from normal walking, and it is why lower back and calf soreness are the two most common early complaints.
The structures under most new stress: the feet, the calves and Achilles, the shins, the knees on descent specifically, the lower back, and the trapezius and shoulders where the straps sit.
Here is the part that catches people out: the cardiovascular system adapts to rucking far faster than the connective tissue does. Within three or four weeks you will feel comfortable breathing under a load that your tendons and feet have not yet adapted to. That gap between what feels easy and what is tolerable is exactly where the injuries happen, and it is the reason for a slow progression that will feel unnecessary at the time.
Month one: establishing tolerance
The first month is about the tissue, not the fitness, and it should feel easy.
Load: roughly 10 percent of body weight. For many people that is 12 to 18 pounds. If in doubt, less. Plate carriers and dedicated ruck plates make this easy to set precisely; water in a bladder or bottles works too and has the advantage that you can dump it if something goes wrong.
Duration: 20 to 30 minutes, twice a week, with at least two days between sessions.
Terrain: flat and predictable. Pavement or a smooth path. Save trails for later; uneven ground adds an ankle and stabilizer demand that is a separate adaptation.
Pace: comfortable conversational. Roughly a normal brisk walk. Do not chase a pace target in month one.
Progression within the month: add five minutes per week to one of the two sessions. Weight stays fixed for the entire month. This is the rule people break most often and it is the one that matters most.
What to monitor: shin soreness, foot soreness the following morning, and any hot spots. Soreness that resolves within a day is normal adaptation. Soreness that is still present at the next session means the last one was too much.
A note on footwear: use shoes with adequate room for swelling and a sole appropriate to your surface. Many people ruck in trail runners or in boots; both work, and the important thing is that they are broken in already. Starting rucking and new footwear in the same week is the classic way to produce blisters that stop the whole project.
Months two and three: adding distance, then weight
This phase is where the sequence matters, and the sequence is distance first.
Weeks five through eight: extend time at the same weight. Build one session toward 45 to 60 minutes while keeping the second at 30. Weight remains at 10 percent. By the end of week eight, an hour at that load should feel genuinely manageable rather than merely survivable.
The reason distance comes before weight: time under load is what builds foot, calf, and connective tissue tolerance, and it does so at a lower peak force than adding weight does. It is the lower-risk adaptation and it prepares the tissue for the higher-risk one.
Weeks nine through twelve: begin adding weight, in small increments. Add roughly five pounds and hold it for two weeks before adding more. When you add weight, reduce the duration for that first session by ten to fifteen minutes, then build back.
The rule that prevents most problems: never increase weight and duration in the same week. Pick one. This feels excessively cautious and it is the single most protective habit in the whole progression.
Frequency can go to three sessions per week in this phase if recovery is good, with one long, one moderate, and one short. Three is plenty; rucking is more demanding on the tissue than its perceived effort suggests, and more is rarely better.
What to add now: basic strength work if you are not already doing it. Calf raises, single-leg work, and posterior chain strength directly support loaded walking and reduce injury risk. Two short sessions a week is sufficient and it pays off substantially over the following months.

Months four through six: terrain, pace, and load
The final phase adds the two variables that were deliberately excluded, and it adds them one at a time.
Terrain comes before pace. Introduce hills and uneven ground at a reduced weight and duration for the first two or three sessions. Descents in particular load the quadriceps eccentrically and the knees substantially more than flat ground, and the added weight amplifies that.
Descending technique matters more than most people realize: shorter steps, a slightly softer knee, and using trekking poles on steeper descents all reduce the load meaningfully. Poles are not a crutch; they redistribute force to the upper body and they are standard practice among people who carry loads long distances.
Pace comes last. Once an hour on rolling terrain at your current weight is comfortable, you can begin working on pace, typically by adding intervals of faster walking rather than by pushing the whole session. A common target is somewhere around a 15-minute mile under load, though this varies enormously with terrain, weight, and individual.
Load can continue rising toward 20 to 25 percent of body weight across this phase, still in five-pound increments held for two weeks each. Beyond about a third of body weight, the risk profile changes significantly and it is territory for people with a specific reason and a lot of accumulated tolerance.
A realistic month-six benchmark for someone who started at zero: 45 to 60 minutes, on mixed terrain, carrying 20 to 25 percent of body weight, twice or three times a week, with no lingering soreness. That is a substantial fitness base and it took six months for good reasons.
This is general information, not medical advice. Shin pain that worsens session to session, sharp or localized bone pain, numbness or tingling in the arms, or foot pain that persists at rest all warrant stopping and getting assessed rather than progressing through.
What Nobody Tells You About Pack Setup
Load height is the single biggest comfort variable, and low is wrong. Weight should sit high on the back, roughly between the shoulder blades, close to the spine. A load that sags toward the lower back pulls you backward, increases the forward lean you have to hold, and produces lower back fatigue that people mistakenly attribute to the weight being too heavy.
The hip belt does more work than the shoulder straps. On a properly fitted pack with a real hip belt, a large share of the load transfers to the hips, which are far better suited to carrying it than the shoulders. If your shoulders are the limiting factor, the belt is either absent, too loose, or positioned wrong. It should sit on the iliac crest, not around the waist.
Torso length matters more than pack volume. Packs come in torso sizes, and a pack sized wrong for your back length cannot be adjusted into fitting. Measuring your torso from the C7 vertebra to the iliac crest takes two minutes and determines whether a pack will ever be comfortable.
Anything that shifts will hurt eventually. Loose weight in a pack moves with every step, and that movement is both an energy cost and an irritation. Weight should be packed tight against the back panel and immobilized.
Women’s-specific packs are not marketing. Shorter torso lengths, differently shaped shoulder straps, and hip belts contoured for a different pelvis geometry all address real fit issues, and for many women they are the difference between a pack that works and one that does not.
The one that solves the most complaints: shoulder strap pain is usually a load position problem, not a padding problem. People respond to sore shoulders by buying thicker straps, which helps marginally. Moving the load higher and tightening the load lifter straps so the weight pulls toward the body rather than away from it helps enormously, and it costs nothing.
How does rucking fit with other training?
It fits well with most things and conflicts with a few, and the conflicts are predictable.
With running: rucking and running load similar tissues, and stacking a heavy ruck the day after a long run is how shin and Achilles problems develop. Separate them by at least a day, and treat a long ruck as roughly equivalent to a moderate run in terms of recovery cost.
With lifting: they complement each other well. Rucking benefits directly from posterior chain and calf strength, and it does not interfere much with strength progress at reasonable volumes. Avoid heavy lower body lifting on the same day as a long ruck.
With general fitness goals: rucking is an efficient way to accumulate zone 2 aerobic work while also loading the skeleton, which has value for bone density. Weight-bearing exercise is associated with bone health benefits, and rucking is weight-bearing by definition.
Weekly structure that works for most people: two to three rucks, two strength sessions, and whatever else you enjoy, with at least one full rest day. Rucking is easy to overdo precisely because it does not feel hard while you are doing it.
Recovery signals to watch: morning foot soreness, calf tightness that does not resolve, and a resting heart rate trending upward across a week. Any of those means reducing volume for a week rather than pushing.
And a practical note on consistency: rucking is unusually easy to sustain because it requires no facility, no specific weather, and very little skill. That is its main advantage over most training modalities, and it is worth protecting by not turning it into something that needs recovering from.
FAQ: Rucking Questions, Answered
How much weight should I actually carry?
Start at roughly 10 percent of body weight and build toward 20 to 25 percent over months. Percentages matter more than absolute numbers, because a 30-pound pack is a very different proposition for a 130-pound person and a 200-pound one.
Do I need a special rucking pack?
No, but you do need one that fits your torso length and holds the weight high and tight. A well-fitted hiking pack works. A gym bag or a school backpack with loose weight in the bottom is the setup most likely to cause problems.
Should I ruck every day?
No. Two to three times a week is the sensible range for most people. Daily rucking gives connective tissue no recovery window, and connective tissue is the limiting factor in this activity.
Is rucking bad for your knees or back?
Progressed sensibly, it is generally well tolerated and it builds tissue capacity. Progressed too quickly, or with a poorly fitted pack that forces excessive forward lean, it can cause problems. The progression rate and the pack fit are the two variables that determine which experience you have.
TL;DR:
- Loaded walking raises ground reaction force at every step, and connective tissue adapts far slower than your cardio does
- Month one: 10 percent of body weight, 20 to 30 minutes, flat ground, weight fixed all month
- Months two and three: extend duration first, then add weight in five-pound steps, never both in one week
- Months four to six: add terrain before pace, and build toward 20 to 25 percent of body weight
- Carry the load high between the shoulder blades with the hip belt on the iliac crest, not sagging low
Weigh your pack before the next session and check it against 10 percent of your body weight. Most people who get hurt started heavier than they thought.
Keep Reading
This article is for general informational and styling purposes only. Fit, sizing, and product availability may vary.